
Replacing the line on your Hills Hoist clothesline is a straightforward process with the right tools and guidance, ensuring optimal drying efficiency and longevity.
Overview of Hills Hoist Clotheslines
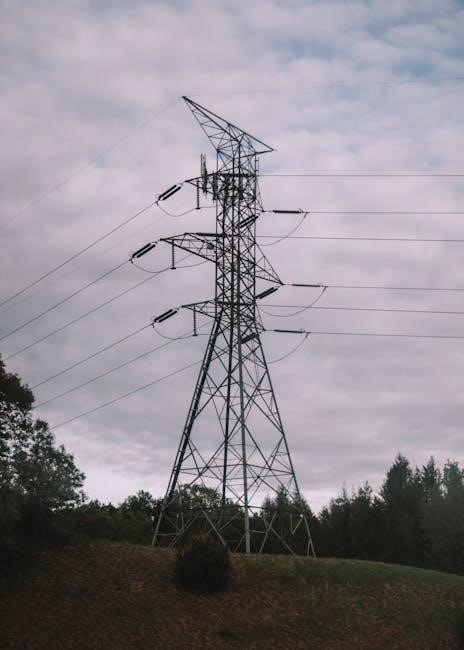
Hills Hoist clotheslines are renowned for their durability and versatility, offering a practical solution for outdoor drying. Known for their height-adjustable rotary designs, these clotheslines maximize drying efficiency by allowing clothes to rotate freely in the wind. They are designed to accommodate various household needs, with models featuring multiple lines to handle larger loads. Constructed with high-quality materials, Hills Hoist clotheslines are built to withstand harsh weather conditions, making them a reliable choice for long-term use. Their innovative mechanisms ensure easy operation and maintenance, making them a popular option for homeowners worldwide.
Importance of Regular Line Replacement
Importance of Regular Line Replacement
Regular line replacement is crucial for maintaining the efficiency and longevity of your Hills Hoist clothesline. Over time, the line can become worn, frayed, or stretched, leading to reduced drying performance and potential safety hazards. Replacing the line ensures that your clothes dry evenly and prevents damage to the hoist mechanism. Additionally, a new line minimizes the risk of breakage, which could cause accidents or further damage. Regular maintenance also helps maintain the structural integrity of the clothesline, ensuring optimal functionality and extending its lifespan. A well-maintained line ensures reliable service and enhances overall user satisfaction.
Tools and Materials Needed for Replacement
Replacing the line on your Hills Hoist requires specific tools and materials to ensure a successful and safe process. Essential items include a replacement line kit, wire cutters, a screwdriver, and a ladder for accessing the hoist. Additional materials like hooks, tensioners, and line retainers may be needed depending on the model. Safety gear such as gloves is recommended to protect your hands during handling. Having all necessary tools and parts readily available will streamline the replacement process and ensure optimal results. Proper preparation prevents delays and ensures a secure, durable installation.
Preparation Steps
Preparation involves ensuring safety, gathering tools, and understanding the hoist mechanism to facilitate a smooth line replacement process.
Safety Precautions Before Starting
Before replacing the line, ensure the hoist is securely locked to prevent sudden movement. Wear gloves and safety goggles to protect against sharp edges or debris. If your Hills Hoist is electric, disconnect the power supply. Inspect the area for any wear or damage that could compromise safety. Use a sturdy ladder or step stool and maintain three points of contact. Avoid working in wet or windy conditions, as this can increase the risk of accidents; Keep children and pets away from the work area. Proper preparation ensures a safe and successful replacement process.
Gathering Necessary Tools and Parts
To replace the line on your Hills Hoist, gather the following tools and parts: a replacement line suitable for your model, a screwdriver, pliers, gloves, and a ladder. Ensure the replacement line is compatible with your Hills Hoist model, as specified in the product manual. You may also need a utility knife to cut the line and a measuring tape for precise adjustments. Additionally, have spare line tensioners and end caps on hand if they appear worn. Always refer to the product manual for specific part recommendations to ensure compatibility and safety during the replacement process.
Understanding the Hoist Mechanism
Understanding the hoist mechanism is crucial for a smooth line replacement. The Hills Hoist operates on a system of rotating arms, tensioners, and a central mast. The line is threaded through these components to create a functional drying system. Familiarize yourself with how the arms fold and unfold, as well as how the tensioners adjust the line’s tautness. Knowing how these parts interact ensures proper threading and tensioning during replacement. This knowledge helps prevent tangles and sagging, ensuring optimal performance after the new line is installed.
Removing the Old Line
Removing the old line involves carefully cutting and detaching it from the hoist mechanism, ensuring no tangles or damage occur during the process for a smooth replacement.
Accessing the Hoist Assembly
Accessing the Hoist Assembly
To access the hoist assembly, lower the clothesline to its fully folded position and engage the locking mechanism. Remove any protective covers or caps covering the line attachment points. Gently pull back the line retainers to expose the line ends. This allows you to safely cut and detach the old line without causing tangles or damage to the mechanism. Ensure all parts are secure before proceeding with the replacement.
Cutting and Detaching the Worn-Out Line
Cutting and Detaching the Worn-Out Line
Using wire cutters, carefully cut the worn-out line at the base of the hoist assembly, ensuring even cuts for easier removal. Gently pull the line free from the retaining clips and hooks. If the line is tangled or stuck, use pliers to grip and twist it loose. Once cut, unwind the line from the spool or hooks, taking care not to damage the surrounding components. Dispose of the old line responsibly and inspect the area for any remaining debris or wear before proceeding with the replacement.
Inspecting for Damage or Wear
Inspecting for Damage or Wear
After removing the old line, inspect the hoist assembly, center pole, and outer arms for signs of damage or wear. Check hooks, tensioners, and retaining clips for rust, fraying, or corrosion. Use a torch to examine hard-to-see areas. Ensure all components are securely attached and functioning properly. If any part is damaged, replace it with original Hills spares to maintain safety and efficiency. Addressing wear now prevents future issues and ensures the new line will perform optimally. A thorough inspection guarantees a reliable setup for years to come.

Installing the New Line
Unroll the new line, thread it through the hoist assembly, and secure both ends tightly. Ensure proper alignment and tension for balanced operation.
Unrolling and Preparing the Replacement Line
Unrolling and Preparing the Replacement Line
Begin by laying the replacement line flat on the ground to avoid tangles. Unroll the entire length and inspect for any twists or knots. Cut the line to the required length using a utility knife or scissors, ensuring it matches the original specifications. Leave approximately 200mm of excess at each end for securing. Gently stretch the line to remove any kinks, ensuring it lies straight and evenly. This step is crucial for proper tensioning and smooth operation of your Hills Hoist clothesline.
Threading the Line Through the Hoist
Threading the Line Through the Hoist
Start by threading one end of the replacement line through the first end cap on the hoist assembly. Gently guide the line through each subsequent cap, ensuring it aligns correctly without twisting. Use a steady, consistent motion to prevent tangles or kinks. Once all caps are threaded, pull the line taut to ensure proper seating and alignment. Double-check that the line is evenly distributed and not twisted before proceeding to secure the ends. This step ensures the line is correctly positioned for tensioning and optimal performance of your Hills Hoist clothesline.
Securing the Line Ends Properly
Securing the Line Ends Properly
Once the line is threaded through the hoist, tie a secure knot at each end to prevent it from slipping out. Ensure the knots are tight and positioned correctly. Trim any excess line with scissors or a utility knife to avoid fraying. For added security, consider using line retainers or small plastic clips to hold the ends in place. Double-check that the line is evenly tensioned and properly seated in the hoist mechanism. This step ensures the line remains stable and functional, preventing premature wear or detachment during use.
Tensioning the Line
Proper tensioning ensures the line remains taut, preventing sagging and uneven drying. Adjust the line tightly and test its stability to ensure optimal performance and durability.
Adjusting the Tension for Optimal Use
Adjusting the Tension for Optimal Use
Begin by tightening the line gradually, ensuring it’s evenly taut across all segments. Avoid overtightening, as this may cause structural strain. Test by gently pulling the line; it should feel firm but not rigid. Proper tension ensures clothes dry efficiently and prevents sagging. If the line feels loose, repeat the tightening process until the desired tautness is achieved. This step is crucial for maximizing the lifespan of your Hills Hoist and ensuring reliable performance;
Testing the Line After Tensioning
Testing the Line After Tensioning
After tensioning, inspect the line for evenness and tautness. Gently tug each segment to ensure it feels firm and stable. Check for any sagging or unevenness, adjusting as needed. A properly tensioned line should not droop or wobble excessively. Perform a visual inspection to confirm the line is evenly spaced and aligned. This step ensures the clothesline functions smoothly and securely, preventing issues during use. Proper testing guarantees reliability and optimizes drying performance for your Hills Hoist.
Troubleshooting Common Issues
Identify issues like tangled lines or uneven tension. Inspect for damage, adjust tension, and ensure proper alignment. Addressing these problems ensures smooth operation and longevity of your Hills Hoist.
Dealing with Tangled or Uneven Lines
Dealing with Tangled or Uneven Lines

When encountering tangled or uneven lines, begin by unwinding the entire line and laying it flat to identify knots or twists. Gently untangle the line, ensuring it is free from kinks before rethreading. For uneven lines, check the tension and adjust as needed to ensure even distribution. If lines remain uneven, inspect the hooks or pulleys for misalignment. Proper threading and tensioning are key to preventing future tangles and ensuring the Hills Hoist operates smoothly. Regular maintenance can help avoid these issues and extend the life of your clothesline.
Addressing Line Sag or Slack
To address line sag or slack, inspect the tensioning mechanism and tighten the lines as needed. Ensure the line is evenly distributed across the hooks, adjusting the tensioners to maintain a taut position. If sagging persists, check for worn-out tension springs or pulleys, which may need replacement. Regularly tightening the lines after use helps prevent slack from developing. Proper tension ensures efficient drying and prevents damage to the clothesline structure. Addressing sag promptly extends the lifespan of your Hills Hoist and maintains its performance.
Maintenance and Care
Regularly inspect the line and mechanism for wear. Clean the hoist and line with mild detergent to prevent dirt buildup. Lubricate moving parts annually.
Regular Inspection Schedule
Regular Inspection Schedule
Inspect your Hills Hoist clothesline every month and before heavy use. Check for frayed or worn lines, rust on metal parts, and loose connections. Clean dirt or debris buildup with a mild detergent and water. Lubricate the hoist mechanism annually to ensure smooth operation. Replace any damaged or excessively worn components immediately to prevent further issues. Regular checks will help maintain efficiency and extend the lifespan of your clothesline, ensuring reliable performance for years to come.
Cleaning the Line and Hoist
Cleaning the Line and Hoist
Clean your Hills Hoist clothesline regularly to maintain performance. Use a mild detergent and water to wipe down the line and hoist mechanism. Avoid harsh chemicals or abrasive materials that could damage the finish. Remove dirt or debris buildup, especially around the tensioner and pulleys, to ensure smooth operation. Dry the line thoroughly after cleaning to prevent rust or mineral deposits. For moving parts, apply a small amount of silicone-based lubricant to keep them functioning smoothly. Regular cleaning prevents wear and tear, ensuring your clothesline remains efficient and reliable for years.
Replacing your Hills Hoist line ensures optimal performance and longevity. Regular maintenance and proper tensioning guarantee efficient clothes drying and extend the lifespan of your clothesline.
Replacing the line on your Hills Hoist involves removing the old, worn-out line, inspecting for damage, and installing a new one. Start by opening the hoist and cutting the old line, then unroll and thread the replacement line through the mechanism. Secure the ends properly and adjust the tension for optimal use. Regular inspection and maintenance are crucial to ensure longevity and efficiency. This DIY process requires minimal tools and can be completed with ease, saving you money and extending the life of your clothesline. Proper tensioning and care ensure reliable performance for years to come.
Benefits of Proper Line Maintenance
Proper maintenance of your Hills Hoist line ensures optimal performance, preventing issues like tangling, sagging, or uneven drying. Regular checks and timely replacements extend the lifespan of the clothesline, reducing wear and tear. A well-maintained line also enhances safety, preventing accidents caused by snapped or loose lines. Additionally, it protects your clothing from damage and ensures efficient drying. By investing time in maintenance, you save money on frequent repairs and enjoy a reliable, durable clothesline for years to come.