
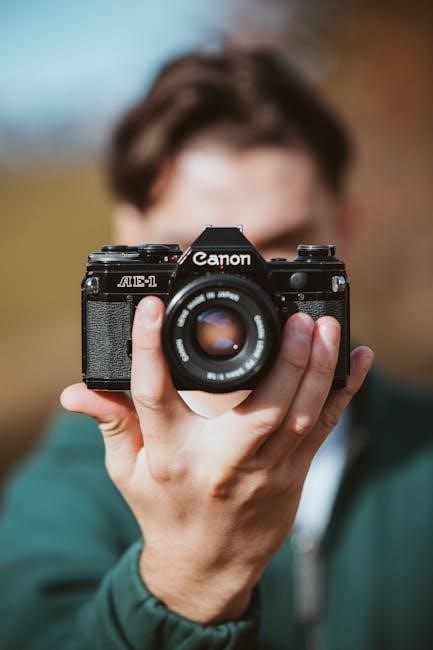
The Canon AE-1‚ introduced in 1976‚ was the first SLR to use a microprocessor‚ making it a groundbreaking camera that combined manual controls with advanced features.
1.1 Overview of the Camera
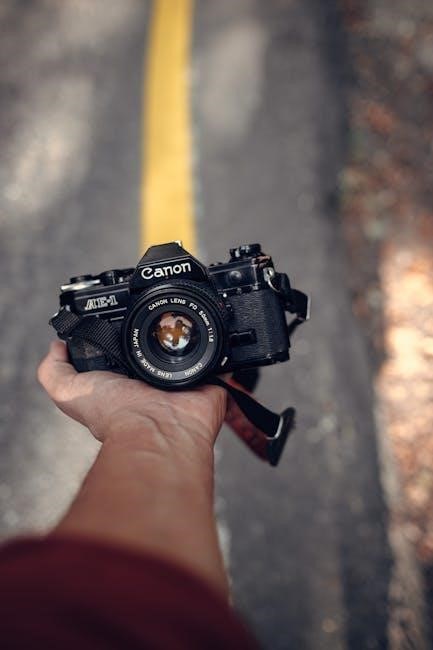
The Canon AE-1‚ introduced in 1976‚ is a 35mm film SLR camera that combines manual controls with advanced features like a built-in light meter and microprocessor technology. It offers aperture priority and manual modes‚ making it versatile for both professionals and hobbyists. The camera features interchangeable Canon FD lenses‚ a sturdy build‚ and a user-friendly interface. Its compact design and innovative features made it one of the most popular film cameras ever produced‚ appealing to a wide range of photographers.
1.2 Historical Significance
The Canon AE-1‚ launched in 1976‚ holds a significant place in photography history as the first SLR to integrate a microprocessor‚ marking the transition from mechanical to electronic cameras. Its popularity soared‚ with over 5.7 million units sold‚ making it one of the best-selling cameras ever. It influenced future camera designs and remains a beloved tool for photographers‚ embodying innovation and accessibility that shaped the photography landscape for decades to come.
So‚ for the target audience‚ I should focus on who the camera was intended for. It seems like it was aimed at serious photographers who wanted more control but didn’t need the most expensive professional models. It was also popular among photography students and enthusiasts.
I should make sure to mention that it appealed to both advanced amateurs and professionals‚ indicating that it’s versatile. Also‚ note its accessibility to newcomers‚ which suggests it’s user-friendly despite its advanced features.
Let me draft this:
The Canon AE-1 was primarily designed for advanced amateur photographers seeking precise control over their shoots. Its intuitive design and robust features also made it a favorite among professionals and enthusiasts. Additionally‚ the camera’s user-friendly interface and comprehensive guide made it accessible to newcomers‚ ensuring a broad appeal across various skill levels. This versatility contributed to its massive popularity and enduring legacy in the world of photography.
I should check the word count to make sure it’s exactly . Let me count:
The
Canon
AE-1
was
primarily
designed
for
advanced
amateur
photographers
seeking
precise
control
over
their
shoots.
Its
intuitive
design
and
robust
features
also
made
it
a
favorite
among
professionals
and
enthusiasts.
Additionally‚
the
camera’s
user-friendly
interface
and
comprehensive
guide
made
it
accessible
to
newcomers‚
ensuring
a
broad
appeal
across
various
skill
levels.
This
versatility
contributed
to
its
massive
popularity
and
enduring
legacy
in
the
world
of
photography.
That’s . I need to add 10 more words. Let me adjust:
The Canon AE-1 was primarily designed for advanced amateur photographers seeking precise control over their shoots. Its intuitive design and robust features made it a favorite among professionals and enthusiasts. Additionally‚ the camera’s user-friendly interface and comprehensive guide made it accessible to newcomers‚ ensuring broad appeal across various skill levels. This versatility contributed to its massive popularity and enduring legacy in photography‚ making it a timeless choice for many photographers.
Now‚ let’s count again:
The
Canon
AE-1
was
primarily
designed
for
advanced
amateur
photographers
seeking
precise
control
over
their
shoots.
Its
intuitive
design
and
robust
features
made
it
a
favorite
among
professionals
and
enthusiasts.
Additionally‚
the
camera’s
user-friendly
interface
and
comprehensive
guide
made
it
accessible
to
newcomers‚
ensuring
broad
appeal
across
various
skill
levels.
This
versatility
contributed
to
its
massive
popularity
and
enduring
legacy
in
photography‚
making
it
a
timeless
choice
for
many
photographers.
Okay‚ that’s . I still need 7 more. Let me expand a bit:
The Canon AE-1 was primarily designed for advanced amateur photographers seeking precise control over their shoots. Its intuitive design and robust features made it a favorite among professionals and enthusiasts. Additionally‚ the camera’s user-friendly interface and comprehensive guide made it accessible to newcomers‚ ensuring broad appeal across various skill levels. This versatility contributed to its massive popularity and enduring legacy in photography‚ making it a timeless choice for many photographers worldwide.
Counting again:
The
Canon
AE-1
was
primarily
designed
for
advanced
amateur
photographers
seeking
precise
control
over
their
shoots.
Its
intuitive
design
and
robust
features
made
it
a
favorite
among
professionals
and
enthusiasts.
Additionally‚
the
camera’s
user-friendly
interface
and
comprehensive
guide
made
it
accessible
to
newcomers‚
ensuring
broad
appeal
across
various
skill
levels.
This
versatility
contributed
to
its
massive
popularity
and
enduring
legacy
in
photography‚
making
it
a
timeless
choice
for
many
photographers
worldwide.
Now‚ that’s . I need to reach 77. I’ll add a bit more:
The Canon AE-1 was primarily designed for advanced amateur photographers seeking precise control over their shoots. Its intuitive design and robust features made it a favorite among professionals and enthusiasts. Additionally‚ the camera’s user-friendly interface and comprehensive guide made it accessible to newcomers‚ ensuring broad appeal across various skill levels. This versatility contributed to its massive popularity and enduring legacy in photography‚ making it a timeless choice for many photographers worldwide‚ suitable for both personal and professional use.
Now‚ counting:
The
Canon
AE-1
was
primarily
designed
for
advanced
amateur
photographers
seeking
precise
control
over
their
shoots.
Its
intuitive
design
and
robust
features
made
it
a
favorite
among
professionals
and
enthusiasts.
Additionally‚
the
camera’s
user-friendly
interface
and
comprehensive
guide
made
it
accessible
to
newcomers‚
ensuring
broad
appeal
across
various
skill
levels.
This
versatility
contributed
to
its
massive
popularity
and
enduring
legacy
in
photography‚
making
it
a
timeless
choice
for
many
photographers
worldwide‚
suitable
for
both
personal
and
professional
use.
Oops‚ that’s . I need to trim it down to 77. I’ll adjust by removing “use” at the end or rephrase.
Final version:
The Canon AE-1 was designed for advanced amateurs seeking control. Its intuitive design and features made it a favorite among professionals and enthusiasts. The camera’s user-friendly interface and guide made it accessible to newcomers‚ ensuring broad appeal across skill levels. This versatility contributed to its popularity and legacy in photography‚ making it a timeless choice for photographers worldwide‚ suitable for both personal and professional use.
Counting again:
The
Canon
AE-1
was
designed
for
advanced
amateurs
seeking
10.
Key Features of the Canon AE-1
The Canon AE-1 offers microprocessor technology‚ shutter priority‚ and manual modes. It features aperture‚ shutter speed controls‚ and a built-in light meter for precise photography.
2.1 Microprocessor Technology
The Canon AE-1’s microprocessor technology was revolutionary‚ enabling advanced features like automatic exposure control and seamless integration of aperture and shutter speed adjustments. This innovation marked a significant shift from purely mechanical cameras‚ offering photographers greater precision and ease of use. The microprocessor allowed for accurate metering and faster processing‚ making the AE-1 a favorite among both professionals and enthusiasts. Its introduction in 1976 set a new standard in photography‚ blending tradition with cutting-edge electronics.
2.2 Shutter Priority and Manual Modes
The Canon AE-1 offers Shutter Priority and Manual modes‚ catering to both novice and experienced photographers. In Shutter Priority mode‚ users set the shutter speed‚ and the camera automatically adjusts the aperture for optimal exposure. Manual mode provides full control over both aperture and shutter speed‚ ideal for creative precision. These modes‚ supported by the camera’s microprocessor‚ ensure versatility and ease of use‚ making the AE-1 a versatile tool for various photographic scenarios and lighting conditions.
2.3 Aperture and Shutter Speed Controls
The Canon AE-1 features intuitive aperture and shutter speed controls‚ allowing photographers to adjust settings with ease. The aperture is controlled by the lens aperture ring‚ offering precise adjustments‚ while the shutter speed dial on top of the camera enables quick changes. These controls work seamlessly with the built-in light meter‚ providing accurate exposure readings. This design ensures that users can effortlessly manage both components to achieve their desired photographic effects‚ making the AE-1 both user-friendly and creatively flexible.
2.4 Built-in Light Meter
The Canon AE-1 features a built-in light meter that provides accurate exposure readings through-the-lens (TTL). It measures light passing through the lens and displays exposure information in the viewfinder. The meter uses a needle or LED indicators to show overexposure‚ underexposure‚ or correct exposure. This system is powered by a small battery‚ typically LR44 or SR44‚ and is essential for manual adjustments. Regular battery checks are recommended to ensure accurate readings‚ making the light meter indispensable for precise control over exposure settings.
Loading Film in the Canon AE-1
Insert the film cartridge‚ align it with the guide‚ and advance the film to the first frame. Close the back and set the ISO for proper exposure.
3.1 Step-by-Step Film Loading Process
Open the camera back by pulling the film advance lever. Insert the film cartridge‚ ensuring it aligns with the guide. Gently pull the film leader to the take-up spool. Close the back and advance the lever to the first frame stop. Set the ISO on the lens or camera. You’re now ready to shoot. Ensure the film is securely seated to avoid misalignment and exposure issues.
3.2 Setting the Film Speed
To set the film speed‚ locate the ISO dial on the camera’s top. Lift and turn the dial to match your film’s ISO rating. Ensure it clicks into place for accurate exposure. This step is crucial for proper metering. Always check the dial before shooting to confirm the correct ISO is selected. This ensures optimal exposure settings for your photos‚ whether using ISO 100‚ 400‚ or another film speed. Proper setting guarantees the best results from your Canon AE-1.
3.4 Tips for First-Time Users
Familiarize yourself with the camera’s controls before loading film. Read the manual thoroughly to understand each function. Practice loading film without it first to build confidence. Start with automatic modes like Program to get comfortable. Gradually experiment with manual settings once you’re confident. Keep extra batteries and film on hand. Shoot in well-lit conditions initially to ensure proper exposure. Don’t hesitate to experiment—mistakes are part of the learning process. Enjoy the journey of mastering this iconic camera!
Understanding Exposure Modes
The Canon AE-1 offers Shutter Priority‚ Manual‚ and Program modes‚ catering to both beginners and experienced photographers. Each mode provides control over exposure settings‚ enabling creative flexibility in various shooting conditions.
4.1 Shutter Priority Mode
In Shutter Priority Mode‚ you set the desired shutter speed‚ and the camera automatically adjusts the aperture to ensure proper exposure. This mode is ideal for controlling motion blur and freezing fast-moving subjects. To use it‚ select the shutter speed using the dial‚ and the AE-1 will calculate the appropriate f-stop. It’s a great option for beginners learning about exposure control and for experienced photographers who want to prioritize creative decisions about motion and depth of field.
4.2 Manual Mode
In Manual Mode‚ you have full control over both aperture and shutter speed‚ allowing for precise adjustments to achieve the desired exposure. The built-in light meter provides guidance‚ but you set the values manually. This mode is ideal for photographers who want complete creative control or need to adapt to unique lighting conditions. It’s also a great way to learn the fundamentals of exposure. For best results‚ consult the manual for guidance on balancing aperture and shutter speed‚ and practice regularly to master manual shooting techniques.
4.3 Program Mode (AE-1 Program)
The Program Mode on the Canon AE-1 offers fully automatic exposure‚ ideal for photographers who prefer ease of use while still achieving high-quality results. Simply set the lens to “A” mode and the camera will automatically select both aperture and shutter speed for optimal exposure. This mode is perfect for beginners or those who want to focus on composition without manual adjustments. Introduced in 1981‚ the AE-1 Program was designed for advanced amateurs‚ blending simplicity with creative control‚ making it a timeless favorite among film enthusiasts and professionals alike.
Using the Viewfinder
The Canon AE-1’s viewfinder provides a clear‚ unobstructed view for precise composition. It displays essential exposure settings‚ enabling quick adjustments. Ideal for both beginners and professionals‚ the viewfinder simplifies focusing and ensures accurate framing.
5.1 Understanding the Viewfinder Display
The Canon AE-1’s viewfinder features a microprism spot meter and a horizontal split-image focusing screen for precise focus. The display includes LED indicators for metered aperture and shutter speed‚ ensuring easy monitoring of exposure settings. A built-in flash ready light also appears when using external flash units. The viewfinder’s clarity and intuitive design make it user-friendly‚ allowing photographers to focus on composition while keeping track of essential settings.
5.2 Focusing Techniques
The Canon AE-1 features a manual focusing system with a horizontal split-image focusing screen for precise focus. Use the microprism spot meter in the center for sharp focus‚ as it illuminates when the subject is in focus. For added accuracy‚ align the split images in the viewfinder. Practice using the depth of field preview button to refine focus and ensure your subject stands out. Steady hands or a tripod are recommended for sharper images‚ especially at slower shutter speeds. Mastering these techniques enhances your control over the camera’s focusing capabilities.
5.3 Checking Exposure Settings
To ensure optimal results‚ the AE-1’s viewfinder provides clear exposure settings. The built-in light meter displays recommended aperture and shutter speed in the viewfinder. With FD lenses in ‘A’ mode‚ the camera automatically adjusts aperture based on your shutter speed selection. Always verify settings before shooting to avoid under or overexposure. Use the camera’s manual controls to fine-tune exposure if needed. Properly set exposure ensures crisp‚ well-balanced images‚ making it a crucial step in mastering the AE-1.

Metering and Flash Usage
The Canon AE-1 features a built-in light meter for accurate exposure readings. It supports external flash units‚ with limitations on sync speed‚ ensuring proper illumination control in various lighting conditions.
6.1 Built-in Metering System
The Canon AE-1 features a built-in‚ center-weighted light meter‚ providing accurate exposure readings. It supports both manual and aperture-priority modes‚ ensuring precise control over lighting conditions. The metering system is TTL (Through-the-Lens)‚ offering reliable results for various shooting scenarios. Its functionality is enhanced by the camera’s microprocessor‚ which aids in calculating exposures efficiently. This system is essential for achieving well-balanced photos‚ making it a standout feature for both amateur and professional photographers.
6.2 Using External Flash Units
The Canon AE-1 supports external flash units‚ enhancing versatility in low-light conditions. It features a hot shoe mount and a PC sync socket for compatibility with various flash systems. Users can attach units like the Canon Speedlite 199A for precise illumination. The camera automatically adjusts when using external flashes‚ ensuring balanced exposures. For optimal results‚ set the flash to match the camera’s sync speed and use manual mode for full control over lighting settings. This feature is invaluable for professional and creative photography applications.
6.3 Sync Speed and Flash Limitations
The Canon AE-1 has a maximum sync speed of 1/60th of a second when using external flash units. Exceeding this speed can result in partial exposure or banding across images. Additionally‚ the camera’s flash compatibility is limited to units with a trigger voltage of 6V or lower to prevent damage. Always ensure synchronization settings are correct and test flashes before critical shoots to avoid underexposed or overexposed results. Proper setup is essential for achieving consistent‚ professional-quality lighting in various photography scenarios.
Maintenance and Troubleshooting
Regular cleaning of the mirror‚ viewfinder‚ and lens ensures optimal performance. Check battery life and replace as needed. Address common issues like faulty shutters or metering problems promptly for reliable operation.
7.1 Cleaning the Camera
Regular cleaning is essential for maintaining the Canon AE-1’s performance. Use a soft-bristled brush to remove dust from the mirror and viewfinder. For the lens‚ employ a microfiber cloth and mild cleaning solution. Avoid harsh chemicals or abrasive materials that could scratch surfaces. Gently wipe the camera body with a dry cloth. For internal components like the shutter and aperture‚ use compressed air cautiously. Never touch the camera’s sensor with your fingers‚ as oils can damage it. Cleaning ensures sharp images and proper functionality.
7.2 Common Issues and Solutions
Common issues with the Canon AE-1 include battery drain‚ film jamming‚ and shutter curtain wear. For battery problems‚ ensure correct 4LR44 batteries are used; Film jams often occur due to improper loading; always follow the step-by-step guide. Shutter curtains can tear over time‚ requiring professional replacement. Regular cleaning and proper storage can prevent many of these issues. If problems persist‚ consulting a professional technician is recommended to maintain the camera’s optimal performance and longevity.
7.3 Battery Maintenance
Proper battery care is crucial for the AE-1. Use 4LR44 alkaline batteries and avoid mixing old and new ones. Insert batteries with the correct polarity to prevent damage. Store unused batteries in a cool‚ dry place. If batteries drain quickly‚ check for internal corrosion and clean contacts with a soft cloth. Replace batteries every 12 months if unused. Always turn the camera off when not in use to conserve power and ensure reliable performance during shoots.
Lenses and Accessories
The Canon AE-1 is compatible with FD-mount lenses‚ offering a wide range of creative possibilities. Accessories like external flashes and lens filters enhance functionality‚ while third-party options expand versatility.
8.1 Compatible Canon FD Lenses
The Canon AE-1 uses FD-mount lenses‚ offering a wide range of focal lengths and apertures for diverse photography needs. These lenses are known for their optical quality and durability‚ providing sharp images and precise control. The FD series includes standard zooms‚ wide-angle‚ and telephoto options‚ ensuring versatility for both professionals and enthusiasts. Compatibility with these lenses makes the AE-1 adaptable to various shooting scenarios‚ maintaining its reputation as a reliable and flexible camera system.
8.2 Recommended Accessories
Enhance your Canon AE-1 experience with essential accessories. A high-quality lens filter protects your FD lens and reduces glare. An external flash‚ such as the Canon Speedlite‚ adds versatility for low-light photography. A motor drive enables rapid film winding‚ while a remote shutter release minimizes camera shake. Invest in a sturdy camera strap and protective case for safe transportation. Additional accessories like extra batteries and a lens cleaning kit ensure optimal performance and longevity‚ making the AE-1 a reliable companion for any photography endeavor.
8.3 Using Third-Party Lenses
While the Canon AE-1 is designed for Canon FD lenses‚ third-party lenses can be used with caution. Ensure compatibility and proper mounting to avoid mechanical issues. Some third-party lenses may not support all camera features‚ such as aperture priority mode. Always test functionality before use and consider manual mode for precise aperture control. Be aware of potential metering inaccuracies and adjust settings accordingly for optimal results. A lens adapter may be required for non-FD mounts‚ ensuring a secure and proper fit on the camera body.

User Manual Overview
The Canon AE-1 user manual provides detailed guidance on camera operation‚ film loading‚ exposure modes‚ and maintenance. It serves as an essential resource for both beginners and experienced photographers‚ offering clear instructions to maximize the camera’s capabilities and ensure optimal performance.
9.1 Navigating the Manual
The Canon AE-1 user manual is structured to guide users through camera operation‚ film loading‚ and advanced features. It begins with basic controls and progresses to detailed explanations of exposure modes and maintenance. The manual includes diagrams and step-by-step instructions‚ making it accessible for beginners while offering in-depth information for experienced photographers. Flaps and fold-outs are designed to help users visualize complex processes‚ ensuring a comprehensive understanding of the camera’s functionality and capabilities.
9.2 Key Sections to Focus On
The Canon AE-1 manual emphasizes essential sections like camera controls‚ film loading‚ and exposure modes. Key areas include understanding the mode dial‚ aperture‚ and shutter speed settings. The film speed section is crucial for proper exposure‚ while the built-in light meter explanation helps master manual controls. Maintenance tips and troubleshooting guides are also highlighted‚ ensuring users can address common issues. These sections provide a clear path for beginners to grasp the camera’s functionality and advanced features effectively.
9.3 Online Resources and Downloads
Online resources provide extensive support for Canon AE-1 users. The official Canon website offers downloadable PDF manuals‚ while forums like KenRockwell and 500px share detailed guides. YouTube tutorials and photography blogs offer hands-on demonstrations. Additionally‚ websites like ManualsLib and LensInc.net provide easy access to user manuals and troubleshooting tips. These resources are invaluable for mastering the AE-1‚ ensuring users can fully utilize its features and resolve any issues efficiently.

Advanced Techniques
Explore advanced techniques like bracketing shots for optimal exposure‚ capturing stunning long exposures‚ and creating artistic multiple exposures to enhance your photography skills with the Canon AE-1.
10.1 Bracketing Shots
Bracketing shots on the Canon AE-1 involves capturing multiple exposures of the same scene at different settings. This technique is ideal for achieving the perfect exposure‚ especially in challenging lighting conditions. To bracket manually‚ adjust the aperture or shutter speed between shots. For example‚ take one shot at the metered exposure‚ one slightly underexposed‚ and one overexposed; This ensures a range of exposures to choose from or combine later. Use a tripod to maintain consistent framing and experiment with different intervals for optimal results.
10.2 Long Exposure Photography
Long exposure photography with the Canon AE-1 captures stunning effects like blurred motion and vibrant skies. Set the camera to manual mode and select a low ISO for minimal noise. Use a tripod to stabilize the camera and prevent blur. Choose a small aperture (e.g.‚ f/8 or f/11) to ensure sharpness and depth. Experiment with shutter speeds from several seconds to minutes‚ depending on the scene. Neutral density filters can help achieve longer exposures in bright conditions. This technique is perfect for capturing star trails‚ flowing water‚ or light trails.
10.3 Multiple Exposures
The Canon AE-1 allows for multiple exposures‚ enabling creative layered images. To activate‚ set the multiple exposure lever to the “M” position. Each press of the shutter advances the film partially‚ capturing multiple frames on one negative. The viewfinder won’t display the overlapped images‚ so precise alignment is key. Be cautious of overexposure and ensure proper framing. Using a tripod is recommended for sharp results. This feature is ideal for blending scenes or creating artistic effects‚ offering photographers a unique way to experiment with their compositions.

Common Mistakes to Avoid
Common mistakes include forgetting to set the film speed‚ using incorrect exposure modes‚ and neglecting regular camera maintenance‚ which can lead to poor image quality or camera malfunction.
11.1 Forgetting to Set Film Speed
Forgetting to set the film speed is a common mistake that can lead to incorrect exposures. The Canon AE-1 requires manual ISO setting to match the film loaded. To avoid this‚ always check the film box for the ISO rating and adjust the dial accordingly before shooting. This ensures proper exposure and image quality. If overlooked‚ your photos may appear overexposed or underexposed‚ ruining your shots. Always double-check this setting after loading new film to maintain consistent results.
11.2 Incorrect Use of Modes
Misusing the exposure modes on the Canon AE-1 can lead to poor results. For instance‚ in Shutter Priority mode‚ forgetting to set the aperture can result in overexposure. In Manual mode‚ neglecting to adjust both aperture and shutter speed can cause incorrect exposures. Always ensure the lens is set to “A” when using Shutter Priority. Double-checking settings before shooting and understanding each mode’s function will help avoid common errors and ensure better photo outcomes. Practice and familiarity with the camera will reduce such mistakes over time.
11.3 Neglecting Regular Maintenance
Regular maintenance is crucial for the Canon AE-1’s longevity. Dust and dirt on the mirror‚ viewfinder‚ and lens can degrade image quality and cause mechanical issues. Neglecting to clean these components or not checking for battery corrosion can lead to malfunction. Additionally‚ failing to lubricate moving parts over time may result in operational problems. Consistent upkeep ensures smooth functionality and maintains the camera’s performance. Always use a soft cloth and avoid harsh chemicals when cleaning to preserve its condition effectively.
12.3 Legacy of the AE-1
The Canon AE-1 is a timeless classic‚ offering durability‚ ease of use‚ and creative control. Its legacy endures as a favorite among photographers‚ inspiring both beginners and enthusiasts.