
The LiftMaster 850LM manual is an essential guide for installing, programming, and troubleshooting the universal gate and garage door opener receiver. It provides detailed instructions for setup, remote pairing, and resolving common issues, ensuring seamless integration with various devices and systems.
Overview of the LiftMaster 850LM
The LiftMaster 850LM is a universal gate and garage door opener receiver designed for compatibility with various devices and systems. It supports up to three channels, with each channel capable of managing a specific number of remote controls and keypads. This receiver is ideal for both residential and commercial applications, offering a robust and reliable solution for controlling gate operators and garage door openers. Its universal design ensures seamless integration with existing systems, including LiftMaster gate operators and MAX remote controls. The 850LM is known for its ease of installation, advanced security features, and compatibility with smart home systems, making it a versatile and efficient choice for users seeking reliable control solutions.
Importance of the Manual for Users
The LiftMaster 850LM manual is crucial for users to ensure proper installation, operation, and troubleshooting of the receiver. It provides step-by-step guides for remote pairing, LED indicator interpretations, and resolving connectivity issues. The manual also highlights security features like secure pairing and encryption, ensuring users understand how to protect their systems from unauthorized access. By following the manual, users can avoid common mistakes, optimize device performance, and take full advantage of the receiver’s advanced features. Regularly referring to the manual ensures smooth operation and helps users maintain their system’s integrity over time.
Key Features of the LiftMaster 850LM
The LiftMaster 850LM offers universal compatibility with existing garage and gate systems, supporting up to three channels. Channel 1 accommodates 50 remotes, while Channels 2 and 3 support 20 each. It features a secure pairing process with LED indicators for status confirmation. The receiver is compatible with MAX remote controls and integrates with MyQ smart garage systems for enhanced functionality. Its advanced encryption ensures data security, protecting against unauthorized access. Designed for retrofits, the 850LM works seamlessly with various gate operators, making it a versatile solution for modern smart home setups.

Installation and Setup
The LiftMaster 850LM requires careful mounting and wiring, ensuring the antenna is properly connected for optimal signal strength. Follow the manual’s step-by-step guide for a smooth setup;
Step-by-Step Installation Guide
Begin by unpacking the LiftMaster 850LM receiver and its accessories. Mount the receiver near your garage door or gate operator, ensuring easy access. Connect the wires according to the wiring diagrams provided in the manual. Secure all connections to prevent loose contacts. Plug in the power supply and ensure it is stable. Once powered on, test the receiver by pairing a remote control to verify basic functionality. Follow these steps carefully for optimal performance.
Wiring and Connectivity Requirements
The LiftMaster 850LM receiver requires precise wiring to ensure proper functionality. Use 18-22 AWG wires for connections to the gate or garage door operator. The power supply should be stable and meet the voltage specifications. Connect the receiver to compatible devices, ensuring all terminals are securely fastened. Refer to the wiring diagrams in the manual for specific configurations. Avoid overloading circuits, as this may cause malfunctions. The receiver supports up to three channels, with each channel accommodating a maximum of 50, 20, and 20 remote controls, respectively. Proper wiring ensures reliable performance and prevents connectivity issues.
Universal Compatibility with Existing Systems
The LiftMaster 850LM receiver is designed for universal compatibility, seamlessly integrating with various gate and garage door operators. It works with LiftMaster models like the 811LM and 813LM, as well as MAX remote controls. This versatility makes it ideal for retrofits or updates. The receiver supports up to three channels, each compatible with a set number of remote controls and keypads. However, it is not compatible with MyQ-enabled devices. Its universal design ensures it can be used with existing systems from other manufacturers, providing a cost-effective solution for upgrading or expanding access control systems without requiring major overhauls.

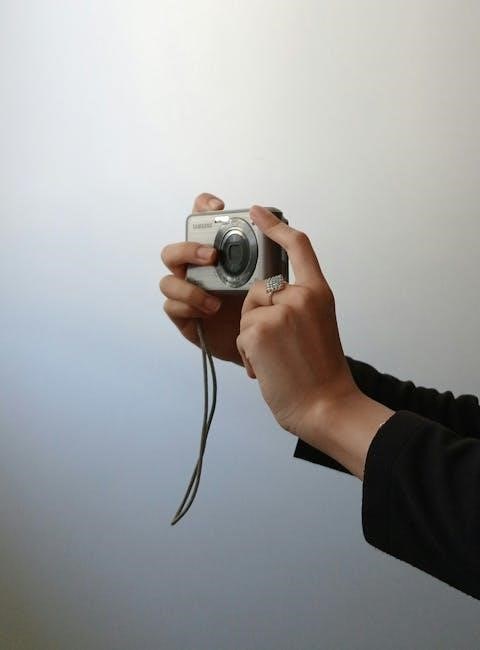
Pairing and Programming Remotes
Pairing and programming remotes with the LiftMaster 850LM is straightforward using the learn button and LED status indicator. It works seamlessly with MAX remotes for easy setup.
Using the Learn Button for Remote Pairing
The Learn Button on the LiftMaster 850LM receiver simplifies remote pairing by syncing remotes to the system. Press and hold the button until the LED flashes, indicating pairing mode. Follow manual instructions to complete the process. The LED provides visual confirmation of successful pairing. Troubleshooting tips include resetting the remote or checking for interference. This feature ensures secure and efficient remote integration with the receiver, enhancing user convenience and system reliability.
Troubleshooting Remote Pairing Issues
Common issues during remote pairing include the LED not blinking or remotes failing to sync. Ensure the Learn Button is functioning and the receiver is in pairing mode. Check for weak battery strength in remotes, as this can prevent successful pairing. If the LED does not indicate readiness, reset the receiver or consult the manual for specific troubleshooting steps. Interference from nearby devices may also disrupt pairing. Move devices away and retry. If issues persist, consider resetting the remote or receiver to factory settings before attempting pairing again.
LED Indications for Pairing Status
The LED on the LiftMaster 850LM receiver provides visual feedback during remote pairing. A solid LED indicates the receiver is ready to pair, while a blinking LED signals active pairing in progress. If the LED does not light up, ensure the Learn Button has been pressed correctly. Erratic blinking may indicate interference or a failed pairing attempt. Refer to the manual for specific LED patterns and their meanings. Understanding these indicators helps diagnose and resolve pairing issues efficiently, ensuring a smooth setup process for your remote controls.

Troubleshooting Common Issues
Identify issues using LED indicators and manual guidelines. Address pairing failures, connectivity problems, and channel capacity limits. Reset or re-pair devices as needed for optimal performance.
LED Indicators and Their Meanings
The LiftMaster 850LM features LED indicators that provide crucial status information. The learn button LED flashes when the receiver is in pairing mode, while steady illumination confirms successful pairing. Amber LEDs indicate errors or connectivity issues, helping diagnose problems quickly. Green LEDs signal normal operation, ensuring users can verify system functionality at a glance. Monitoring these indicators allows for efficient troubleshooting, such as identifying channel overload or pairing failures. Understanding LED behaviors is key to maintaining optimal performance and resolving issues promptly. Refer to the manual for a detailed breakdown of each LED’s significance and corresponding actions. This visual feedback system simplifies user interaction and maintenance.
Resolving Connectivity Problems
Connectivity issues with the LiftMaster 850LM can often be resolved by checking wiring and ensuring all connections are secure. Verify that the receiver is properly powered and free from physical obstructions. Resetting the system by cycling power may also resolve intermittent issues. Ensure remotes are paired correctly and within range. If problems persist, check for interference from nearby devices or excessive channel usage. Refer to the manual for troubleshooting steps, such as resetting remote controls or reprogramming channels. Addressing these common causes can restore connectivity and ensure reliable operation of your garage or gate system.
Workarounds for MyQ Compatibility
While the LiftMaster 850LM receiver is not officially compatible with MyQ-enabled devices, users have discovered workarounds to achieve integration. One method involves using the Learn Button to pair the myQ-G0401-ES smart garage control with the receiver. Ensure the receiver is in programming mode, then activate the Learn Button and follow the myQ app instructions. Note that this workaround may not enable all MyQ features. Additionally, compatibility varies by channel, with Channel 1 supporting up to 50 remotes, and Channels 2 and 3 supporting 20 each. This workaround allows limited MyQ functionality, though official support is not provided by LiftMaster.
Compatibility and Integration
The LiftMaster 850LM offers universal compatibility, working seamlessly with existing gate operators and garage door systems. It supports MAX remote controls and integrates effortlessly with various devices for enhanced functionality.
Compatibility with MyQ Smart Garage Control
The LiftMaster 850LM receiver is not directly compatible with MyQ-enabled garage door openers or devices. However, users have reported success with specific workarounds to pair the MyQ-G0401-ES smart control with the 850LM. The manual emphasizes that the receiver is designed for universal compatibility with gate operators and existing systems, but MyQ integration may require additional configuration. For optimal performance, ensure all devices are updated to the latest firmware and consult the manual for detailed pairing instructions. Compatibility with MAX remote controls is supported, but MyQ features may not function seamlessly without specific adjustments.
Integration with LiftMaster Gate Operators
The LiftMaster 850LM receiver is designed to work seamlessly with LiftMaster gate operators, offering a universal radio solution for retrofits or updates. It supports existing gate operators manufactured by LiftMaster and other brands, ensuring compatibility and smooth operation. The receiver’s universal design allows it to integrate with a wide range of systems, making it ideal for upgrading or replacing older units. By following the manual’s instructions, users can easily connect the 850LM to their gate operators, enabling reliable control and operation. This integration ensures enhanced functionality and convenience for managing gate access.
Support for MAX Remote Controls
The LiftMaster 850LM receiver is fully compatible with MAX remote controls, including models like the 811LM and 813LM. This compatibility ensures users can enjoy advanced features such as secure pairing and extended range. The receiver supports multiple MAX remotes, allowing for shared access and convenience. By integrating MAX remotes, users benefit from reliable communication and enhanced security. The manual provides clear instructions for pairing MAX remotes, ensuring a seamless setup process. This feature-rich compatibility makes the 850LM an ideal choice for those seeking modern, efficient control solutions for their garage or gate systems.

Security Features
The LiftMaster 850LM manual highlights advanced security features, including secure pairing processes and encryption to protect against unauthorized access, ensuring safe and reliable operation of your system.
Secure Pairing Process
The LiftMaster 850LM ensures a secure pairing process using advanced encryption to prevent unauthorized access. To pair a remote, press and hold the Learn Button until the LED flashes, indicating it’s ready. Release and press the remote button to sync. The LED will confirm successful pairing with a steady light. This rolling code technology enhances security by generating unique codes for each use, safeguarding against hacking. Ensure no interference from other devices during pairing for optimal results;
Protection Against Unauthorized Access
The LiftMaster 850LM incorporates advanced security features to protect against unauthorized access. It uses rolling code encryption, ensuring each remote transmission is unique and cannot be duplicated. The system is designed to ignore signals from unknown or unpaired remotes, enhancing privacy and security. LED indicators provide visual confirmation of secure connections, while compatibility with MyQ-enabled devices adds an extra layer of protection. Regular firmware updates further safeguard the system against potential vulnerabilities. By prioritizing secure communication and exclusive channel settings, the 850LM ensures only authorized users can control the garage or gate, maintaining your property’s safety and integrity.
Encryption and Data Security
The LiftMaster 850LM employs robust encryption to safeguard data transmissions, ensuring secure communication between remotes and receivers. It utilizes rolling code technology, which generates a unique code for each transmission, preventing unauthorized access. The system encrypts all data, protecting against eavesdropping and hacking. Firmware updates enhance security by addressing potential vulnerabilities. Compatibility with MyQ-enabled devices extends security features, allowing users to monitor and control access remotely. The 850LM’s encryption ensures data integrity and compliance with industry security standards, providing peace of mind for users concerned about unauthorized breaches or data interception.
Programming and Customization
The LiftMaster 850LM offers customizable settings and programming options, supporting up to three channels with varying remote capacities, ensuring compatibility with MAX controls for enhanced user control.
Programming the 850LM Receiver
Programming the LiftMaster 850LM receiver involves using the learn button to synchronize remote controls and keypads. The process typically starts with pressing and holding the learn button until the LED indicator flashes, signaling readiness. Each channel supports a specific number of remotes, with Channel 1 accommodating up to 50 remotes, while Channels 2 and 3 support 20 each. The manual provides step-by-step guidance for customizing settings and troubleshooting pairing issues. Ensure compatibility with MAX remote controls and follow the instructions carefully to avoid connectivity problems. Proper programming ensures seamless operation and integration with existing systems. Refer to the manual for detailed instructions and LED indicator meanings.
Customizing Remote Control Settings
Customizing remote control settings for the LiftMaster 850LM allows users to tailor functionality to their preferences. The process involves using the learn button to assign specific buttons on remotes to desired operations. Users can program individual buttons for functions like opening, closing, or light activation. The manual provides guidance on adjusting sensitivity and operational modes. LED indicators on the receiver and remotes offer feedback during customization. Compatibility with MAX remote controls ensures a seamless experience. After programming, test all settings to ensure proper functionality. Refer to the manual for troubleshooting tips if issues arise during customization. Proper setup ensures reliable performance and convenience for users. Always follow the manual’s instructions for optimal results.
Advanced Configuration Options
The LiftMaster 850LM offers advanced configuration options for enhanced functionality. Users can customize channel assignments, with Channel 1 supporting up to 50 remotes and Channels 2 and 3 supporting 20 each. The receiver allows for multi-channel control, enabling precise management of different devices. Advanced settings include adjusting sensitivity and operational modes for tailored performance. The manual provides detailed guidance on configuring these features. Compatibility with MAX remote controls and LiftMaster gate operators ensures versatility. Users can also set up custom responses for specific remote buttons, enhancing ease of use. Proper configuration ensures optimal performance and seamless integration with existing systems. Always refer to the manual for precise instructions.
Maintenance and Upkeep
Regular maintenance for the LiftMaster 850LM involves cleaning the receiver, checking for firmware updates, and ensuring proper installation and wiring to prevent operational issues.
Regular Maintenance Tips
Regular maintenance ensures optimal performance of the LiftMaster 850LM receiver. Clean the receiver and remote controls periodically to prevent dust buildup. Check wiring connections for any damage or corrosion and secure loose wires. Test remote range monthly to ensure reliable operation. Replace batteries in remotes when power weakens. Update firmware and software as new versions become available to enhance functionality and security. Inspect antennas for proper alignment and ensure they are free from obstructions. Perform a system reset if connectivity issues persist. Refer to the manual for specific guidelines tailored to your setup.
Updating Firmware and Software
Updating the firmware and software of the LiftMaster 850LM receiver is crucial for maintaining optimal performance and security. Regular updates provide bug fixes, enhance compatibility with remotes and smart devices, and add new features. To update, connect the receiver to a computer via the provided cable and use the LiftMaster software tool. Ensure the device is powered on during updates to avoid corruption. Follow the on-screen instructions carefully to complete the process. After updating, test all remote controls and smart integrations to confirm functionality. Refer to the manual for detailed steps and troubleshooting common update issues. Keep the system up-to-date for reliability.
Cleaning and Care Instructions
Regular cleaning and proper care are essential to maintain the LiftMaster 850LM receiver’s performance. Use a soft, dry cloth to wipe the exterior, avoiding harsh chemicals that could damage the finish. Gently clean the learn button and connections with a cotton swab to ensure optimal functionality. Protect the device from moisture and extreme temperatures to prevent damage. Avoid placing it in direct sunlight or humid environments. Check for dust buildup in vents and crevices, using compressed air if necessary. Handle the device with care to prevent physical damage and ensure all ports remain debris-free. Regular inspections and a clean environment will help extend the lifespan of your LiftMaster 850LM receiver.
Integration with Smart Home Systems
The LiftMaster 850LM seamlessly integrates with smart home systems, offering compatibility with MyQ smart garage control and smartphone apps. It works universally with LiftMaster gate operators and existing systems, ensuring easy retrofits and updates for enhanced smart home functionality.
Compatibility with Smart Home Devices
The LiftMaster 850LM is designed to integrate seamlessly with smart home systems, offering enhanced control and convenience. While it is not directly compatible with MyQ-enabled devices, users have found workarounds to pair the 850LM with MyQ Smart Garage Control for advanced functionality. The receiver supports MAX remote controls and is compatible with various smart home platforms, allowing users to control their garage or gate via smartphone apps. Its universal radio solution makes it ideal for retrofits or updates, ensuring compatibility with existing systems. This flexibility enables homeowners to enjoy modern smart home features while maintaining reliable operation of their garage or gate systems.
Controlling via Smartphone Apps
Controlling your garage or gate via smartphone apps is convenient with the LiftMaster 850LM. While the receiver itself isn’t MyQ-enabled, users have discovered workarounds to integrate it with the MyQ Smart Garage Control, allowing app-based control. The receiver supports MAX remote controls and works with various smart home systems. You can control lights and access your garage or gate remotely through compatible apps. Setup is typically one-time, eliminating the need to reconnect each time you use the app. This integration enhances security and accessibility, making it easy to manage your property from anywhere. Regular updates ensure compatibility and smooth operation with the latest smart devices.
Seamless Integration with Existing Systems
The LiftMaster 850LM receiver is designed for universal compatibility, making it a versatile solution for retrofits or updates. It works seamlessly with existing gate operators from LiftMaster or other manufacturers, ensuring smooth integration into your current setup. Compatible with MAX remote controls, the receiver supports up to three channels, allowing for a mix of remotes and keypads. Its universal radio solution is ideal for upgrading or expanding your garage or gate control systems. Whether you’re using LiftMaster products or other brands, the 850LM ensures a seamless and efficient integration, providing reliable performance and flexibility for your specific needs.
Best Practices for Use
Ensure optimal placement for reception, manage multiple remotes efficiently, and avoid interference from other devices to maximize performance and reliability of the LiftMaster 850LM system.
Optimal Placement for Reception
For optimal reception, place the LiftMaster 850LM receiver in a central location, avoiding physical obstructions like walls or metal structures. Ensure it is mounted at a height that minimizes interference from other devices. Keep it away from sources of electromagnetic interference, such as power lines or wireless routers. Line-of-sight placement between the receiver and remote controls enhances signal strength. Avoid placing it in enclosed spaces or behind dense materials, as this can weaken the signal. Proper placement ensures reliable operation and consistent connectivity for all paired devices.
Managing Multiple Remote Controls
Managing multiple remote controls with the LiftMaster 850LM involves organizing remotes across three channels. Channel 1 supports up to 50 remotes, while Channels 2 and 3 each support 20. Assign remotes to specific channels based on user type, such as family or guests. Pair each remote to a channel using the Learn button for controlled access. Track and label remotes by channel for easy identification. Regularly update access rights and unpair remotes when necessary. Maintain a master list of paired remotes and ensure secure storage to prevent unauthorized use. This system ensures efficient access management and security.
Avoiding Interference from Other Devices
To ensure optimal performance of your LiftMaster 850LM receiver, minimize interference from other electronic devices. Place the receiver away from sources of electromagnetic interference, such as cordless phones, microwaves, and neighboring Wi-Fi networks. Use a stable power supply and avoid overloading circuits. Keep the receiver away from physical obstructions like walls or metal objects that may weaken signal strength. Regularly update firmware to improve interference resistance. If issues persist, consult the manual for troubleshooting tips or reset the receiver to factory settings. This ensures reliable operation and maintains seamless communication with paired remote controls.

Frequently Asked Questions
Discover common questions about the LiftMaster 850LM, including remote pairing, channel capacity, and LED indicator issues, to ensure smooth operation and troubleshooting of your device.
Common Questions About Pairing
Users often inquire about pairing issues with the LiftMaster 850LM, such as why the learn button LED doesn’t indicate readiness or how to resolve channel capacity limits. Many ask about the maximum number of remotes each channel can support, with Channel 1 accommodating up to 50 remotes, while Channels 2 and 3 support 20 each. Others seek clarification on LED indicators, which signal pairing status through specific blinking patterns. Troubleshooting tips, like resetting the receiver or ensuring compatibility with MAX remote controls, are frequently requested. Consulting the manual or troubleshooting guide is recommended for resolving these common pairing challenges effectively.
Understanding Channel Capacity
The LiftMaster 850LM receiver features three channels, each with specific remote control capacity limits. Channel 1 supports up to 50 remotes, while Channels 2 and 3 support up to 20 remotes each. This distribution allows users to organize remotes efficiently, ensuring smooth operation. Understanding channel capacity is crucial for managing multiple devices and preventing overload. The manual specifies these limits to ensure compatibility and performance. Users should refer to the guide for details on assigning remotes to channels, maximizing functionality, and maintaining optimal system performance without exceeding capacity constraints.
Resolving LED Indicator Issues
LED indicators on the LiftMaster 850LM play a crucial role in troubleshooting. If the LED doesn’t light up during pairing, check the power supply and ensure the learn button is pressed correctly. If the LED flashes erratically, it may indicate a failed pairing attempt or system error. Refer to the manual for specific LED patterns and their meanings. Restarting the receiver or reprogramming remotes often resolves these issues. Ensure all connections are secure and firmware is up-to-date for optimal performance. Addressing LED issues promptly helps maintain smooth operation and prevents further complications. Always consult the manual for detailed troubleshooting steps.